Pest Control

The Impact of Pesticides on the Environment

Pest Control Richardson TX protects the environment and human property from harmful insects, rodents, and birds. These pests cause damage, contaminate food, spread diseases, and reduce property value.

Some plants, trees, and animals are more resistant to pests than others. Using resistant varieties helps keep pest populations below unacceptable levels. Pheromones and juvenile hormones can also monitor and control pest populations.

Preventive pest control means modifying the environment to discourage pests from living or breeding in an area. This includes preventing access to food, water, and shelter. It also involves minimizing clutter and providing adequate ventilation. In addition, removing debris and sanitizing surfaces where food is prepared can help deter some pests.

Some potential pest entry points are easy to modify, such as using screens on windows and keeping doors closed. Other entry points, such as openings around utility lines and loose siding, are more difficult to eliminate. Regular inspections can identify these problems, and patching or filling them as soon as they are discovered can prevent pest infestation.

In most pest situations, prevention is a primary goal. This is especially important in indoor areas where certain pests can cause significant harm. For example, rodents can chew through wires, causing fire hazards and damaging equipment and electronics. Their droppings can also contaminate food and transmit diseases such as salmonellosis. Pests can also bring in allergens that aggravate asthma and other health conditions.

Preventative measures include sanitizing work areas and storing food in sealed containers. Cleaning counters and sinks regularly, removing trash regularly, and ensuring that garbage is sealed tight can also deter many types of pests. It is important to identify the type of pest and their habits to select the best preventative tactics. For example, sticky traps can help to identify insects and their locations, while rodent droppings are identifiable by their dark color and oily rubbing marks on walls.

Biological pest control uses natural organisms to destroy unwanted pests, such as bacteria, viruses or parasites. These methods do not involve the use of chemicals and are usually more environmentally friendly than chemical pesticides. However, they may take longer to work and may not be as effective in some situations.

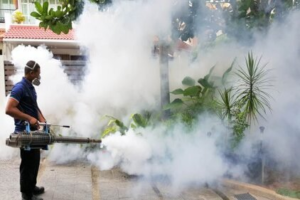
Chemical pesticides are often necessary, but should be used with care. They should be selected for their effectiveness against the pest and for their minimum impact on people and other organisms. They should be applied sparingly, as directed and always in a well-ventilated area. Fogging devices can be helpful in large spaces, but should never be used where there are children or pets present. In addition, a good knowledge of the pest’s life cycle is necessary to ensure that only the target pest is affected and that beneficial organisms are not killed as well.

Suppression

Pest control is the management of organisms that impact human occupancy or use of an area, harming natural resources or spreading diseases. These organisms can be bacteria, fungus, birds, rodents, weeds, or insects. Some are beneficial, such as pollinating insects or soil aerators; others can be harmful, including invasive species that disrupt ecosystems and disease vectors like mosquitoes and ticks.

Pests can be present in urban, agricultural and other settings. They include rodents like rats and mice, birds (like pigeons and seagulls), invertebrates (like mites and flies) or arthropods such as caterpillars and beetles. They can also be plant pathogens or disease agents like nematodes and fungi.

Suppression of pests is the first step in pest control and involves reducing their numbers to an acceptable level. This can be done through a number of control methods, ranging from physical traps to chemicals. It may involve altering the environment through irrigation, modifying the host plant, or by providing alternative food sources. Some organisms can be conserved or introduced as predators, parasites, or prey to pest populations (such as the ladybug that feeds on aphids in an orchard, or Encarsia formosa wasp that parasitizes greenhouse whiteflies).

Threshold-based decision making is important when it comes to using pest control methods. For example, noticing a few wasps in the yard does not require action, but seeing them every day or in increasing numbers probably does.

Some of the most common pest control methods are mechanical and physical, such as traps, netting, and barriers. They can be effective in removing or deterring some organisms, but they are not very efficient in controlling their population or stopping them from returning. Integrated pest management (IPM) uses preventative measures to keep the number of pests at an acceptable level and only resorts to chemical control when necessary. Proper sanitation practices help reduce the carryover of pests from one site to another. Similarly, using pest-free seeds and transplants can limit the spread of certain organisms between crops. The use of basic personal protective equipment is also helpful when working with chemical controls, such as wearing long-sleeved shirts, pants, closed-toe shoes, face and eye protection.

Control

Pests are organisms that interfere with human occupancy, land use or food production. They include bacteria, fungus, plants, birds, rodents, insects, mites, nematodes and other organisms that disrupt natural processes. Pests can also spread diseases in humans, crops and livestock. Pest control involves regulating the number and types of organisms that interfere with your operations.

Pest control is usually an ongoing process. A pest problem may be controlled by changing environmental factors, reducing food or water sources, or by introducing predators and parasitoids. Biological pest control is the use of natural enemies to control unwanted organisms, such as the release of ladybugs to eat aphids or nematodes to kill grubs.

Other forms of pest control are traps and baits. These are generally safer than chemical sprays and can be used with fewer risks to people, pets and the environment. However, it is important to correctly set and place traps and baits, and to monitor them regularly to make sure they are working. Chemical sprays should only be used as a last resort, and they should be carefully applied to the target area. Leaving the room while a spray is working and using a repellent afterwards can help reduce the risk to people, pets and the environment.

Regular inspections of indoor and outdoor areas are necessary to identify and assess the numbers of pests. Inspections can reveal conditions that encourage pest populations and provide information about their behaviour. They can also identify the type of pest and its tolerance level.

Indoor and outdoor areas should be kept as free of clutter as possible, with rubbish disposed of frequently and stored properly. Clutter provides hiding places and a constant source of food for pests. Trash receptacles should be lined with tightly fitting plastic bags, and outdoor rubbish bins should have self-closing lids to prevent access by pests.

Integrated pest management, or IPM, is an ecosystem-based strategy that uses a combination of tactics to avoid the need for chemical controls. It involves monitoring and assessing the pest population, studying its life cycle, choosing the right control method for the tolerance level of the pest in the area and observing local and state regulations.

Monitoring

Regardless of whether you choose prevention, suppression or control, effective pest management requires monitoring. The purpose of pest monitoring is to identify pest problems early, determine the extent of an infestation and monitor the effectiveness of a treatment.

Catch analysis, assessing the level of capture on your traps (sticky boards, electronic fly or moth traps and pheromone traps) is essential to pest monitoring. This information can be trended over time to show improvement or areas that need further action. Keeping accurate records of trapping data is important for record-keeping and also can help you to calculate your action thresholds – the point at which pest populations or environmental conditions suggest that control tactics must be initiated.

Physical exclusion is the first step in controlling pests and includes a variety of cost-effective maintenance activities including screening, caulking, plastering, routine cleaning of surfaces, storing products on shelves or off the floor, and eliminating food, water and shelter sources. Eliminating the presence of harborage points can be accomplished by repairing cracks, gaps, and crevices. Physical control also includes repellents, the use of non-toxic materials that lure or frighten pests away.

The goal of Integrated Pest Management is to prevent pests using an ecosystem-based approach that minimizes the use of harsh chemicals. IPM programs begin with identification and monitoring of pests and their habitat, then utilizes a combination of methods to prevent them, such as biological, physical or chemical controls.

An active, documented pest monitoring programme is an integral part of a comprehensive pest control strategy for any museum. It helps to detect a problem as early as possible and allows for the choice of the most suitable control method, which can avoid unnecessary damage and destruction to collections.

Everyone working in a museum can play an important role in monitoring pests. They can act as the eyes and ears of the institution, observing signs of pests in collection items and reporting them to a member of staff who can deal with the issue. Consider arranging short training sessions or toolbox talks for colleagues to educate them about what to look out for and why monitoring is so important.

Planner

Retirement Planning – How to Plan For Your Post-Work Life

It is important to take advantage of tax-advantaged retirement accounts like 401(k)s and IRAs. Other special accounts include health savings accounts and 529 education plans.

In addition, you’ll need to consider the cost of living. It’s not unusual for prices to increase over time, so plan accordingly. You may also need to save for unexpected events or expenses like a major home repair. Click the Website to learn more.

Retirement goals are financial and personal aims that center around your post-work life. They may include your desired annual retirement income, the lifestyle you wish to enjoy, and other factors.

When setting retirement goals, it’s important to be specific and realistic. This will help you stay on track and make it more likely that you’ll reach your objectives. Keeping your goals realistic is especially crucial when saving for retirement, as it will help you avoid making costly mistakes that could significantly reduce your long-term savings potential.

Having a clear picture of your retirement goals can also make choosing appropriate investments and strategies to grow your nest egg easier. If you’re unsure how to start, consider using a retirement planning calculator to estimate your future costs and determine your current savings status. This will give you a starting point for your goal-setting process and help you determine the amount you need to save each month to reach your target.

It’s also a good idea to share your goals with someone who can hold you accountable. This may be a friend, family member, or even a professional adviser if you’re willing to invest in the expertise. Researchers have found that people are more committed to and successful at reaching their goals when they’re shared with someone else.

In addition, sharing your goals can be an excellent way to get the support you need if needed. This can be particularly helpful when market volatility causes you anxiety about your retirement savings. A supportive person can help you find a healthy coping mechanism and keep your momentum going, even when things get challenging.

Aside from retirement, you may also have other goals you want to achieve during your golden years. These could include travel, fulfilling commitments like your children’s higher education costs, or buying a new home. These expenses will add up over time, so it’s a good idea to budget carefully and stress test your portfolio before retiring. This will help ensure you have enough money to fulfil your aims, and can even allow you the flexibility to make changes in your plans as your needs evolve over time.

Determine How Much You’ll Need to Retire

The key to figuring out how much you’ll need to retire is understanding your unique financial situation. Using a retirement calculator can provide a snapshot of your projected future and help identify any shortfalls you may need to address. The calculator may also offer suggestions for how to make adjustments. Circumstances change, so it’s important to do these calculations fairly often.

The number you’ll need to save in order to retire depends on many factors, including your current savings and investment accounts, the types of retirement assets you hold and when you plan to retire. It is also important to consider additional sources of income in retirement, such as Social Security benefits, pensions and part-time work. In addition, it is a good idea to consider any expenses that you expect will increase in retirement, such as a new house or increased travel.

Some advisors use a rule of thumb, such as 10 to 12 times your final working year’s income at retirement age, to determine how much you should have saved by the time you’re ready to retire. However, this is a simplistic calculation that fails to take into account many other variables, such as your expected annual salary in retirement, any changes in inflation and your investment portfolio’s performance.

A more accurate approach to calculating your retirement number is to start by writing down all the expenses you currently incur on an annual basis, including housing, transportation, food, utilities, entertainment and healthcare costs. Then subtract any expenses you anticipate will decrease in retirement, such as a smaller mortgage or less frequent travel. Finally, add up your anticipated future income from guaranteed sources such as Social Security and a pension, and then multiply that figure by the percentage of your pre-retirement income you’d like to replace each year from your investments in retirement.

The resulting number is the amount you’ll need to save in order to produce this monthly income in perpetuity, or for your life expectancy. This is a complicated calculation, and determining your exact retirement number requires a lot of planning and consideration. However, using a retirement calculator is a great starting point and may help you get on track to reach your goal.

Start Saving Today

The earlier you start saving for retirement, the better. It allows time for compound interest to work in your favor, and it reduces the likelihood that you’ll run out of money once you retire. The best way to start is by taking advantage of your employer’s retirement plans. Many companies offer matching contributions, so it’s worth checking with your HR department to see what options you have available to you.

When you’re saving, think about your post-retirement goals and make sure to include those in your budget. For example, you may want to travel more frequently or spend a certain amount on entertainment each year. You also need to estimate how much your lifestyle will cost in retirement and factor in any unexpected expenses that might arise.

In addition to saving, it’s important to diversify your investments. This will help protect you against any dips in the stock market and ensure that your retirement funds will last throughout your lifetime. It’s not uncommon for people to lose a substantial portion of their savings in the early stages of retirement, so diversification can help you avoid this pitfall.

One of the most common mistakes that people make is to wait until they’re nearing retirement before starting to save. However, it’s never too late to start saving. By setting goals, estimating expenses, and making informed investment decisions, you can build a retirement plan that fits your unique needs.

While some of your current expenses may not continue in retirement, there are other expenses that will probably rise — such as healthcare and housing costs. Additionally, the average American is living longer than ever before, which means that you’ll need to save even more money for retirement. A financial advisor can assist you in developing a comprehensive retirement plan that addresses all of your concerns. They can also help you decide when to take Social Security benefits and how to invest your other assets.

Seek Professional Help

Professional financial planners have the expertise to translate market trends into a strategy that aligns with your risk tolerance and long-term goals. They can also help you determine how much money you’ll need for retirement, and recommend ways to meet that goal. They can also provide guidance with other aspects of retirement planning, such as determining when to claim Social Security benefits and integrating those payments into your overall income plan. Additionally, they can help you navigate the complex tax implications of trust funds, and devise strategies to minimize your tax liability.

One of the major reasons to seek out a retirement planner is to have a clear picture of your financial situation in retirement, which can then inform important decisions about things like where you’ll live and what kind of lifestyle you’ll be able to afford. Having that clarity can also ease your stress level, which is important for both your mental and physical health. Financial stress is linked to a host of ailments, including diabetes, heart disease, migraine headaches and even poor sleep.

Another reason to consider retirement planning is that it can help you avoid outliving your savings. The average life expectancy continues to increase, and the challenge of funding a retirement that lasts 20 or 30 years underscores the importance of meticulous planning. This includes maximizing Social Security benefits, minimizing withdrawals from retirement accounts, and implementing strategies that take into account rising healthcare costs. It also involves regularly revisiting and adjusting your retirement plan.

A well-executed retirement plan will help ensure that your savings last as long as you do, so it’s important to seek out the help of a professional who can guide you through the process. When choosing an advisor, look for someone who is a fee-only fiduciary and works in your best interest. They’ll be free from conflicts of interest, such as commissions or kickbacks from insurance companies or investment firms.

It’s also a good idea to ask an advisor about their credentials and experience, as well as what fees they charge. These may be charged hourly, as a percentage of assets under management or as a flat rate.

Home Improvement

Floor Refinishing Basics

Refinishing is the process of adding a new coat of finish to your hardwood floors. You’ll need to remove all furniture, and cover any fixtures or appliances with painters tape to protect them from sanding dust.

Sanding removes scratches, nicks, discoloration and other imperfections from floorboards. Stain is then applied followed by a topcoat. Contact Floor Refinishing Westchester NY now!

Before applying any new finish, it’s important to sand the floor. This can be done with a hand-held or orbital sander or by renting a power sander. Either way, it is best to wear a dust mask and a HEPA-level N95 respirator during the entire sanding process because wood shavings can get into your sinuses and cause irritation.

It’s also a good idea to use a dustless sanding system, which can save you time and money. Typically, these machines are equipped with filters to help reduce the amount of dust that is created. However, if you’re a beginner, it is recommended that you practice on some old boards to make sure you have the hang of it before using a machine on your floors.

After the sanding is completed, it’s recommended that you vacuum and clean the floor thoroughly. If your floor has any damaged areas that require repairs, this is the ideal opportunity to do it. For example, if the damage has gone through the veneer and reached the wood itself, this would be the perfect time to patch and stain.

If the damage is minimal, you may not need to sand the floor. Instead, a screen and recoat may be necessary. This is a process that involves roughing up your wood floor with a coarse sanding screen and then applying a new protective covering. This is much less expensive and faster than a full refinish.

A recoat is ideal for minor damage, as it will prevent further damage to the hardwood floors and will give them a fresh new look. However, if the damage is extensive or if the boards are showing signs of warping, a complete refinish is required.

Once the floor has been sanded, it’s best to let it dry completely before replacing any furniture. You should also apply plastic tarps over any doors or vents to keep the dust from spreading to other parts of your home. It’s also a good idea to remove the base shoe molding along the walls, as this will allow you to easily reach the wall with your sanding equipment.

Staining

Staining is the next step in floor refinishing. This is where you can give your floors a new color, and some homeowners choose to stain their floors a dark shade. You can also use stain to hide any marks or scratches in your wood floors. If you plan on staining your wood floors, it is best to consult the manufacturer’s instructions for proper preparation. In many cases, the stain must be sanded to bare wood prior to applying.

To sand the floors, you will need to use special specialized equipment to sand away the existing finish. Once the floor is sanded, it will need to be cleaned again to remove any remaining dust.

Before you can apply any stain, it is recommended that you test the color on a small area of your wood flooring. This is a good way to see what the final color will look like and whether it matches your current decor.

During the actual staining process, you will need to work in two-foot sections at a time to maintain a “wet edge.” It is important to follow the grain of the wood when applying the stain, and you may want to use a paintbrush to cut in around the baseboards. Once the stain is applied, let it dry according to the manufacturer’s directions. If you aren’t happy with the results, you can always apply a second coat of stain to your wood floors.

After the stain has dried, you will need to seal your hardwood floors to protect them from damage. You can use either an oil-based or water-based polyurethane. If you decide to use a water-based polyurethane, it is recommended that you choose a low-VOC formula.

Once the polyurethane is applied, it will need to dry for about 24 hours before you can walk on your hardwood floors again. During this time, you should avoid using any cleaning products that may damage the floor. It is also important to keep pets and children off the hardwood floors while they are drying. If they are walked on, it can cause the polyurethane to flake and peel.

Sealing

A good floor sealant creates a barrier between the wood and moisture, protecting it from warping, buckling, or discoloration. It also helps the floors to resist staining and scratching. Floor sealants can be applied as a DIY project or by professionals. Professionals have specialized equipment like drum sanders to prep the floors and experience in determining how many coats are needed for the best results.

Before applying a sealant, it’s necessary to make sure the floors have had all stains, scratches, and other visible damage removed. Depending on the extent of the damage, this may require sanding. While it’s possible to use hand sanders, a large rotary sander is more efficient and gives better results. It’s also important to vacuum and wipe the floors to remove all dust and debris before applying a sealant.

Once the floors are completely sanded and have been vacuumed and wiped, they’re ready for the first coat of sealant. A polyurethane sealant is usually the best option for hardwood floors. It’s available in a variety of sheen levels and provides an attractive and durable finish. However, it’s important to use a water-based sealant as oil-based ones can yellow with age and can also distort the color of any future staining.

The first coat of sealant should be applied using a roller, following the grain of the wood as it goes on. It’s important to allow the first coat to dry for at least six hours. After the first coating, it’s a good idea to lightly sand the surface again with a fine grade of sandpaper. A #220 sandpaper will work well for this. Once again, it’s important to wear breathing protection for this step as the polyurethane dust can be harmful.

After a second coat of sealant has been applied, the floors should be allowed to dry again for at least eight hours. Once the sealant is completely dry, it’s a good idea to wait until the following day before walking on the floors or replacing furniture.

Buffing

Buffing is a vital step in the floor refinishing process, bridging the gap between coarse and fine sanding and the application of a new sealant or finish. This technique enhances the natural beauty of wood floors and provides a durable foundation for future protection. It’s important to understand the mechanics and techniques of buffing in order to properly execute this crucial step.

Before beginning the buffing process, it’s essential to ensure that all sanding steps have been completed and that the floor is fully dry. Failure to do so can lead to scratches and uneven finishes. Additionally, it’s critical to thoroughly clean the floor before buffing and to use a clean buffer pad. Finally, it’s important to maintain consistent pressure and to move the buffer slowly and evenly across the surface of the floor.

It’s also important to select the correct abrasive for each stage of buffing. Using a grit that is too coarse can leave behind scratches, while using a grit that is too fine may not be effective at all. Lastly, it’s essential to change the abrasive regularly as it wears down. Failure to do so can result in an uneven finish and prolong the buffing process.

Once the floor has been buffed, it’s important to allow it to completely dry before applying a new coat of polyurethane. This process can be expedited by using a multi-disc sander that has been equipped with a screen, which will only lightly abrade the top layer of polyurethane and not touch the actual wood.

In addition to sanding, it’s also important to maintain regular maintenance on your wood floors. This includes regularly sweeping and mopping, as well as periodic waxing. Buffing and waxing can extend the life of your wood floor significantly, and will help to prevent the need for refinishing in the future.

Wood floors that are not urethane finished should be waxed twice per year. Before applying wax, the floor should be swept and mopped with an appropriate cleaner and then allowed to dry. Then, the floor should be buffed by hand or with a machine and then a light coat of wax applied according to product instructions.

Plumbing

What Does a Plumber Do?

Plumbers Lexington install, repair and maintain pipes and fixtures that carry water and waste materials in residential, commercial and industrial settings. They must be able to read and interpret blueprints and building plans, and understand regulations and safety codes.

They must also have physical strength and dexterity to handle tools. Plumbers often work with chemicals, solvents and other hazardous substances.

Plumbing systems take away waste water, supply hot and cold water, and regulate indoor climate through pipes, valves, fixtures and other equipment. Plumbers install these systems in new construction projects and repair existing ones. They often work from blueprints and architectural plans, and must be knowledgeable about building codes and regulations. They also need to have excellent customer service skills to interact with clients.

Plumbers are often called on to fix emergency issues, such as clogged drains and broken water heaters. They can also inspect and maintain household drainage systems to ensure that they are functioning properly. They can replace old or damaged pipes and fixtures, as well as repair leaky faucets. Plumbers can also install and repair kitchen and bathroom appliances, such as dishwashers and washing machines.

The plumbing industry is highly regulated and plumbers must be licensed in their state or territory to work legally. Many plumbers get their training through an apprenticeship, which combines classroom instruction with paid on-the-job experience. After completing the program, they must pass an exam to earn their license. In addition, some plumbers pursue additional certifications to expand their knowledge and skills.

Some plumbers choose to specialize in a specific area, such as residential or commercial plumbing. They may also focus on specific types of plumbing fixtures, such as showers or toilets. Some even choose to focus on environmentally friendly plumbing practices. Regardless of their specialization, all plumbers must be knowledgeable about the full range of plumbing services and be able to handle emergency situations.

A successful career as a plumber can provide an excellent income, but it requires hard work and dedication. Most states require years of rigorous training and apprenticeship before plumbers can become licensed. Those who are interested in becoming plumbers should contact local vocational schools or community colleges to learn about the requirements in their area.

In the United States, there are approximately 43,000 licensed plumbers. Most of them are employed by private firms, while others are employed by government agencies or municipalities. The plumbing industry is a growing field, with many opportunities for qualified candidates.

Plumbing systems are vital to our everyday lives, taking waste water away, supplying clean water, and regulating indoor climate through pipes, valves and fixtures. Plumbers install and repair these systems in homes and businesses. Their duties are to inspect the condition of existing plumbing fixtures and pipes, determine the source of problems, and fix them. This involves a range of tasks, from unclogging drains to installing and repairing water heaters. It also includes identifying potential issues and planning for future needs to ensure the longevity of plumbing systems.

Some plumbing jobs are too large for homeowners to take on themselves. For instance, if a home’s main sewer line is damaged by tree roots, it’s best left to a professional plumber rather than trying a DIY solution. Other examples of larger plumbing jobs include running new pipes to a new location, replacing a water heater and implementing gas services. These are all jobs that require an expert plumber and typically have a higher price tag than smaller repairs.

Pipes are responsible for bringing water into and taking waste water out of homes and buildings, so it’s no wonder that they can become damaged over time. Common repair issues that plumbers encounter include clogged drains and toilets, water leaks, and broken pipes. When pipes break, they need to be repaired or replaced immediately to prevent further damage and potential flooding. Plumbers use their knowledge of piping systems to assess the situation and choose the right tools and parts for the job.

Other common plumbing repairs include fixing leaking faucets, shower heads and taps. Plumbers may also replace or install water filters and other appliances that improve the quality of home water. This can help to reduce health risks such as cholera, typhoid and hepatitis.

Most people don’t give much thought to their sewage system until something goes wrong with it. Plumbers can repair or replace sewage systems and their components, including septic tanks, pumps and venting. They can also remove sludge and debris from septic tanks to prevent blockages and promote healthy bacteria in the tank.

Whether they’re installing pipes or repairing fixtures, plumbers must be skilled at working with different materials and tools to complete their tasks. They also need to be able to solve complex problems and make informed decisions. Plumbing can be dangerous work, particularly when plumbers are working with flammable or toxic materials. To avoid these risks, plumbers must follow all safety procedures.

Maintaining plumbing systems is a key component of the job, and plumbers often spend time inspecting the integrity of pipes to identify potential issues before they become serious. For example, a plumber might recommend replacing corroded or damaged parts before they cause an emergency leak or break. This is a critical part of the job that keeps water flowing properly and protects the health and safety of occupants.

Homeowners frequently ask plumbers to help with clogged drains, and this is one of the most common maintenance services offered by these professionals. Clogs are typically caused by food, hair, paper products and other insoluble items that get into the plumbing system and block the flow of waste. Plumbers are able to use a variety of methods and tools to remove clogs and restore full functionality.

In the commercial sector, plumbers are responsible for the installation and maintenance of plumbing systems in office buildings, retail shops, restaurants and other large facilities. This can include everything from the plumbing in bathrooms to the fire sprinkler systems in these buildings. Commercial plumbers need to have extensive knowledge of plumbing codes and regulations in order to install and maintain these systems.

Plumbers who are interested in pursuing this career should be comfortable with the idea of working in tight spaces and spending long periods of time on their feet. They should also be prepared to work odd hours, including evenings and weekends, when emergencies occur. The physical demands of this career should also be considered, as it can involve heavy lifting and working in awkward positions that may lead to back injuries. It is important for plumbers to take regular breaks and practice good work hygiene to reduce the risk of injury.

Plumbing inspection services help homeowners catch problems before they become major issues that require costly repairs or replacements. These professionals use a variety of tools to inspect pipes, fixtures and appliances for leaks, clogs, water pressure, heat loss and other problems. They also have the ability to operate sewer camera systems and backflow preventer devices. Plumbers also inspect and test gas lines for safety.

During a typical home plumbing inspection, the plumber will visually check all visible water supply lines for leaks, corrosion and breaks. They will also examine drain pipes, p-traps and overflow drains for signs of clogs or blockages. The plumber may also run water through these pipes to assess water flow rates and quality. This includes checking faucets, showerheads and toilets for proper function and to see if any repairs are needed. The plumber will also inspect the water heater for proper installation, energy efficiency and safety.

In some cases, the plumber will recommend a complete pipe replacement. This is especially true if the existing pipes are older and approaching the end of their lifespan. Newer, more durable pipes can reduce the likelihood of leaks, clogs and other problems down the road.

Because plumbers are often required to work in tight spaces and on ladders, they need physical stamina and strength to perform their duties. They also need manual dexterity to manipulate small parts and tools. Plumbers must also be able to communicate well with customers, as they must listen carefully to the customer’s concerns and explain technical information in a way that is understandable.

For those who are interested in becoming a plumber, it is recommended to undergo an apprenticeship program or attend vocational school to learn the trade. After completing an apprenticeship, students will need to pass a state exam to receive their certification. This will allow them to start their own plumbing businesses or work for a company that employs plumbers. A plumber should also be knowledgeable about building codes and regulations in their area. They should also be able to read blueprints and plans to determine how to install plumbing components correctly.

Concrete Contractor

How a Bricklayer Lays Bricks

Bricklayers Perth is a skilled tradesperson who constructs, repairs and maintains walls, houses, and other building structures. They work with clay bricks, concrete blocks, and mortar.

Some duties include interpreting work orders, measuring working areas, and using a trowel to lay bricks and mortar. They also may need to lift heavy materials and erect scaffolding.

Bricks are strong, classic, and timeless, making them an excellent building material for various structures. But bricklaying is a skill that requires careful attention and planning to achieve a professional finish. Bricklayers must also have high stamina and strength to perform productive work through long shifts and handle weather conditions.

To begin, bricklayers must prepare the site by clearing and cleaning it. They then need to lay a mortar bed on the ground, slightly thinner than the individual bricks. This mix of concrete and sand should be spread out using a trowel until it is evenly coated.

Once this base has dried, the first course of bricks can be laid. This should be done along a level line, ensuring that the bricks you lay will align. A pin can set this level line by inserting it into the mortar at one end of the wall and stretching it out. This should be done to each of the ends of the wall, and then once the line has been set, it can be lifted and moved up or down with each new course.

Each brick is then placed on the mortar, using a bolster chisel and lump hammer to ensure they are positioned correctly. Once the brick has been pressed down, it needs to be struck and brushed with a “jointer,” a tool that is a piece of tubing of the same size as your joint spacing bent into an “S” shape. This is rubbed across the mortar joints to smooth them out and create a neater finish.

As each course is laid, the bricklayer must ensure that the line is kept straight by checking it with a spirit level, tapping each brick if necessary. As a guide, the first brick of each course should be laid with a half brick at either end to avoid the vertical joints lining up and weakening the structure. Each course should follow this technique until the whole wall is complete.

The mortar used by bricklayers must have the right consistency to keep the layers of bricks together and withstand the structure’s weight. It also must contain the correct amount of moisture to prevent it from being too thick and unworkable during construction sessions.

Mortar can be bought in a dry, pre-mixed form that is combined with water, or it may be mixed on-site. A mixer is useful for creating the ideal mixture but can be expensive to purchase and maintain. The most common ingredients are lime, cement, and sand. However, a variety of additives are available for the mason to include in his mix. These additives can help make the mortar more durable, improve its ability to bond with other materials and increase its overall strength.

Whether mixing your mortar or purchasing pre-mixed, it’s important to follow the instructions on the bag to ensure that the ratio of water to dry material is correct. Most mortar mixes require around 6 quarts of water per 50lb bag. The ingredients should be stirred with a hand or power mixer until the mixture reaches a workable consistency. Once the mortar is mixed, it should hold its shape if you dip a trowel into it and pull it upward.

Once the mortar has been mixed, it should be allowed to rest. This allows the ingredients to rehydrate and bind together. It’s possible to speed up this process by adding a small amount of water. However, this is not recommended as it can cause the mortar to become too wet and difficult to work with.

A bricklayer should test the consistency of his mortar before he uses it. This can be done using a trowel or gloved hand to scoop up a small portion of the mixture. The mortar is ready to use when it holds its shape and does not slide off the trowel or crumble easily.

Some bricklayers prefer to mix their mortar to ensure that the ratio of ingredients is correct and that they can control the quality of the finished product. While this task is time-consuming, producing quality brickwork is often worth the effort.

When laying the first course of bricks, keeping a level and tape measure with you is a good idea. This will help you keep the wall straight as you go. After each brick is set, check it with the level and ensure the mortar underneath and on top of each brick is even. Continue to add bricks to your wall, taking care to butter the ends of each brick and gently press it into place with the trowel handle until it is firmly bedded into the mortar. Once the first course is laid, lift up the guideline for the next row and repeat the process.

Unlike modern smooth bricks, face bricks are wire-cut and have a textured surface. They are also made of a mix of clays with different characteristics. Some are fired at lower temperatures to make them stronger, while others are fired at higher temperatures to give the brick a lighter texture and better color. There are also many different sizes and colors of face bricks available.

Masons use various materials to build buildings, including bricks and concrete blocks. A mason’s job involves many tasks, from laying bricks and pre-cutting stones to mixing mortar and preparing the building site. Many masons start as bricklayers, where they learn the fundamental skills of masonry work.

The craft of bricklaying is complex and requires years of study and apprenticeship to master. More masons need to receive adequate training and knowledge of traditional bricklaying techniques. Inadequate training has resulted in the use of modern bricklaying materials, such as ordinary Portland cement (OPC), which is inappropriate for traditional brickwork and can lead to the deterioration of the bricks themselves.

In addition to the basic skills needed for bricklaying, masons must understand and be able to interpret the nuances of their material. They must know the characteristics of various clays and their varying physical properties, such as absorption, weight, density, chemistry, and chemical composition. They must be able to evaluate and select the appropriate brick for each project based on several factors, such as texture, color, size, and surface finish.

A bricklayer’s work can leave dust and debris, especially when the project involves exterior walls. It’s important to clean up properly so the brick stays intact and doesn’t develop cracks or other problems.

The first step is wetting the brick with a garden hose before applying any cleaning solvents. This will help prevent water damage if the brick is left dry and exposed to the elements.

Once the brick is wet, a basic soap solution or vinegar can clean off dirt and other substances. This is an effective way to remove basic stains from the surface of the brick and can be done regularly to keep your property looking its best.

More difficult stains, such as mold and mildew, may require more serious cleaners. A bleach mixture can be effective for this purpose, as it will dissolve and wash away these substances without damaging the brick.

Muriatic acid is also an effective cleaner for brick, but it is important to follow safety precautions when using this substance. This chemical can be dangerous to touch and should only be used in a well-ventilated area where the fumes can’t reach other surfaces, such as wood or metal.

For stains that are particularly stuck on, such as grease or grass stains around your home’s foundation, you can use a commercial brick-and-mortar detergent. This product can be sprayed onto the brick and scrubbed with a brush to loosen and remove stubborn materials.

You can use a commercial masonry cleaner with hydrochloric acid for more severe stains, such as vanadium staining from rusting metal fixtures in your home. This powerful substance can be dangerous, so you should always wear gloves and goggles when applying it to brick and ensure it is not in contact with other surfaces that could react negatively to the acid. You should also test the solution on a small area of your brick before proceeding with the entire application.